Your web hosting is a critical component of your website's success. Poor hosting will result in many issues, from security breaches to having a painfully slow website and much more.
We offer fully-managed web hosting here at Zadro Web and take a lot of pride in making sure our servers are managed properly. I've been building servers on various cloud providers for a long time and have encountered many nightmare scenarios with clients' websites.
Don't get me wrong; plenty of good hosts are out there. I can only assume most of them are worried about upgrading their servers due to backward compatibility issues.
PHP 5 (aka PHP 5.6) has become unsupported right around the end of 2018.
But guess what? So has PHP 7.0, and it's time to upgrade either branch to the latest version.
Your CMS and PHP
There are plenty of statistics all over the web on how PHP 7 and PHP 8 outperform PHP 5 in terms of requests/second and many other performance benefits.
A faster website is better for SEO, your visitors, and quite frankly, the entire web experience.
If your web hosting provider does not offer the latest PHP version, you would want to ask them to upgrade.
However, I assume you've come here because you manage your own virtual private server (VPS) and want to learn how to upgrade properly.
WordPress
By now, I'm sure you know WordPress 6.3 is out. But, have you looked at their official requirements?
Yep, you guessed it.
They require PHP 7.4, and it's great to see that over 49% of sites are powered with at least PHP 7.4, with increasing migrations to 8.0 and above.
Craft CMS
Our preferred CMS these days is no longer WordPress. Craft CMS is our choice for many reasons, including flexibility, security, and much more.
Craft CMS's current stable release (4.0) requires PHP 8.0 at a minimum and recommends 8.1 or higher.
Login to Your VPS and Backup!
Alright, let's get into it. SSH into your server to follow along.
The very first thing you absolutely must do is perform a backup. This should go without saying, but oftentimes we forget.
You're going to run all the commands throughout these instructions as root or using sudo in front of each command below. Whichever route you prefer for your environment will be fine.
cp -a /etc/php/7.0 /home/your_username/php_7.0_oldThis way, you won't lose any files during the upgrade and can always reference them. Obviously, replace your_username with an actual home folder username.
If you're hosting multiple sites with separate PHP pools, they will get wiped during this upgrade process. The same goes for your INI configuration files if you've made customizations.
Upgrading PHP to 7.4
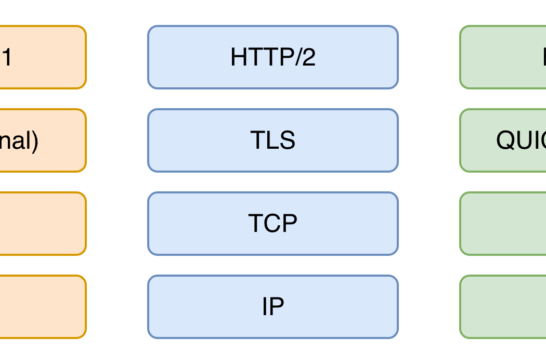
The first thing we're going to do is add the correct repositories. Please keep in mind these upgrade instructions are for Debian or Ubuntu. If you're using another *nix flavor, make sure to use the equivalent command (ie. yum).
apt install ca-certificates apt-transport-https
wget -q https://packages.sury.org/php/apt.gpg -O- | sudo apt-key add -
echo "deb https://packages.sury.org/php/ stretch main" | sudo tee /etc/apt/sources.list.d/php.list
apt-get update
That last line above is important to update all the repositories before moving forward. Now, let's get a list of your currently installed PHP packages.
dpkg --get-selections | grep phpNote all the current PHP packages if you only want to install the same packages. I've gone ahead and created an install command for you with packages I commonly use with Nginx.
apt-get install php7.4-cli php7.4-common php7.4-curl php7.4-dev php7.4-fpm php7.4-gd php7.4-geoip php7.4-gmp php7.4-igbinary php7.4-json php7.4-mbstring php7.4-memcached php7.4-msgpack php7.4-mysql php7.4-opcache php7.4-readline php7.4-soap php7.4-tidy php7.4-xml php7.4-xsl php7.4-zipIf you had php-mcrypt for your selections list, it's now deprecated in 7.4, and it's left out for installation.
If you're running Apache (not sure why you would), your apt-get install instructions above will be different.
Now, if you navigate to /etc/php there should be two folders (7.0 and 7.4). You can copy your PHP pool files over to /etc/php/7.4/fpm/pool.d/, and restart PHP using:
service php7.4-fpm restartYour site should now be live with PHP 7.4!
At this point, you will want to go through your php.ini file and update the new one. I don't recommend copying the old one over the new one, while I guess it should work fine.
An easy way to compare files is:
diff /etc/php/7.0/fpm/php.ini /etc/php/7.4/fpm/php.iniYou can copy the output to a txt file, and it's good practice to make sure you're settings are how you want them anyway. You will also want to check /etc/php/7.4/fpm/php-fpm.conf to update any customization.
Upgrading PHP to 8.3
The same steps above should be applied to upgrade to version 8.0 or 8.3 of PHP.
You can replace all instances of 7.4 with 8.0 or 8.3 -- there are a few items to note:
- The geoip package is no longer available in PHP 8 -- you will need to remove it from the apt install command.
- Restarting PHP 8 will NOT automatically migrate you to the new version -- you will need to manually stop the lower version and start the new version.
service php7.0-fpm stop
service php8.3-fpm start
Cleaning Up the Old Version of PHP
Let's clean up all the old stuff. Remember, you have a backup as well from the first steps.
apt-get purge php7.0-common
apt autoclean && apt autoremove
That's it! You will now still have a 7.0 folder at /etc/php and you can remove using:
rm -rf /etc/php/7.0/You can run the dpkg command from above to check and ensure there aren't any PHP 7.0 packages hanging around. There's a chance that some PHP 7.2 or 7.3 packages were installed during the process.
Just run the same purge command above, replacing with 7.2 and 7.3 -- then, use autoremove again.
These instructions work the same if upgrading from any PHP 7 version.
To Wrap Up
With the latest CMS-required PHP version updates, you definitely want to make this PHP upgrade sooner rather than later. Your website's performance and security depend on it.
I hope these instructions were straightforward, but please let me know if I missed anything by reaching out.